Brachioplasty Patient 13
Back To Arm Lift Gallery
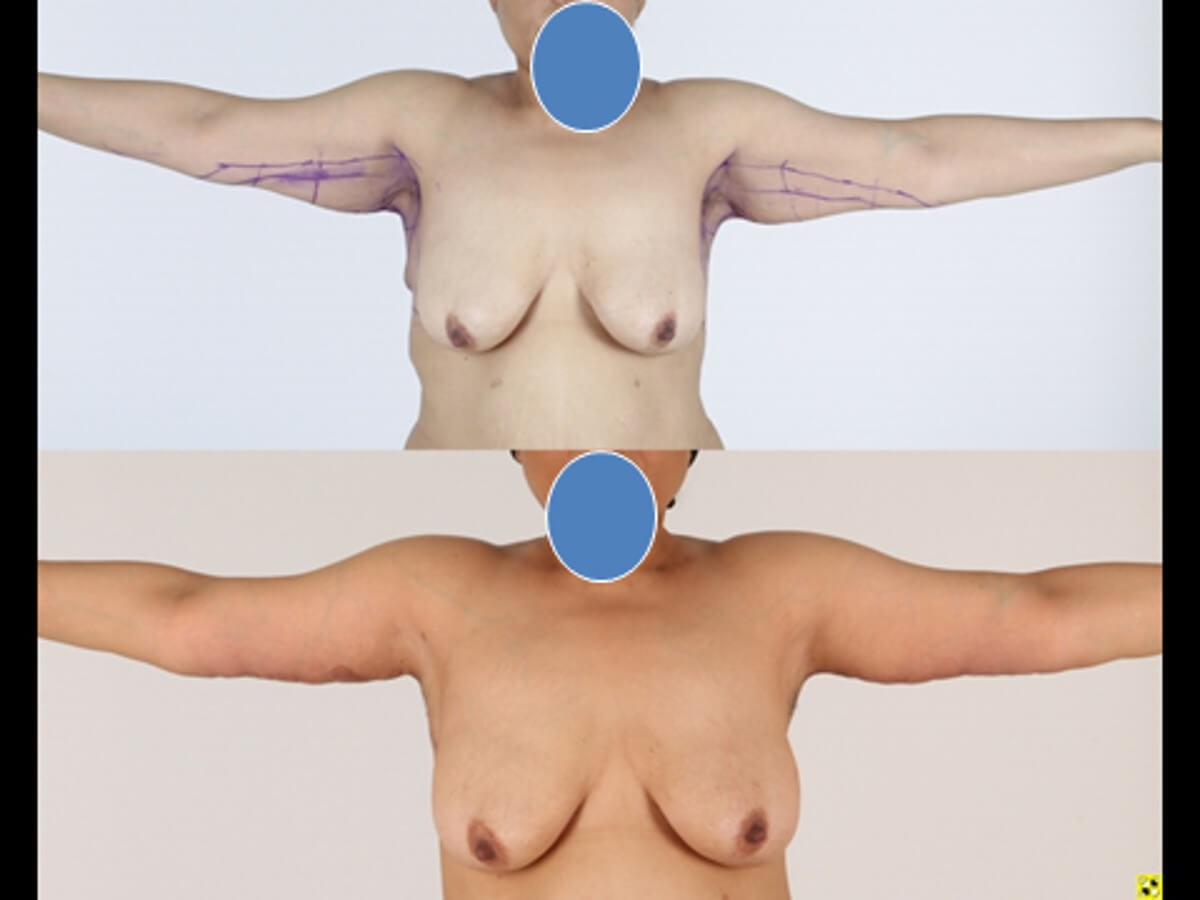
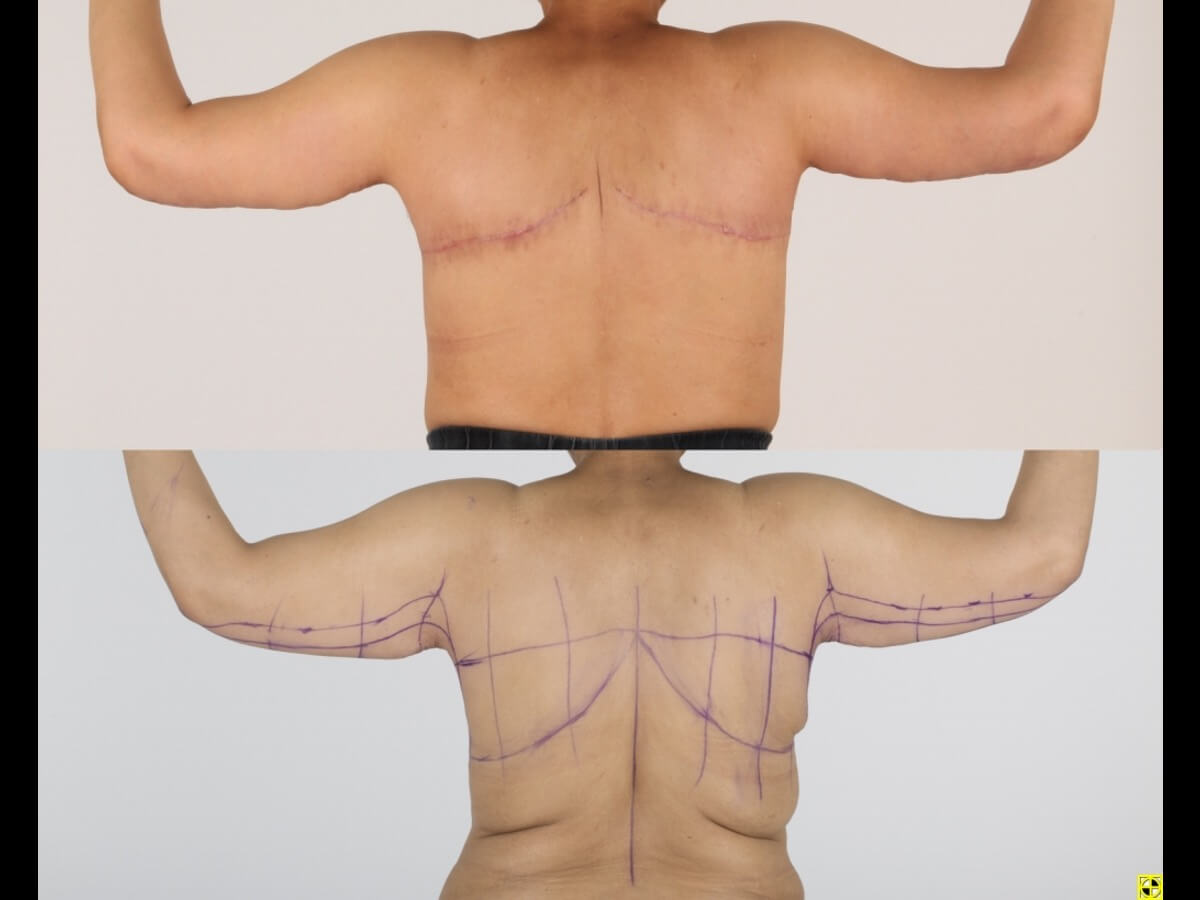
![Brachioplasty Patient 13 | Before and After Arm Lift 1](https://www.alyplasticsurgery.com/wp-content/uploads/gallery-uploads/brachioplasty-19.jpeg)
![Brachioplasty Patient 13 | Before and After Arm Lift 2](https://www.alyplasticsurgery.com/wp-content/uploads/gallery-uploads/brachioplasty-20.jpeg)
![Brachioplasty Patient 13 | Before and After Arm Lift 3](https://www.alyplasticsurgery.com/wp-content/uploads/gallery-uploads/brachioplasty-21.jpeg)
![Thumbnail](https://www.alyplasticsurgery.com/wp-content/uploads/gallery-uploads/brachioplasty-19-300x225.jpeg)
![Thumbnail](https://www.alyplasticsurgery.com/wp-content/uploads/gallery-uploads/brachioplasty-20-300x225.jpeg)
![Thumbnail](https://www.alyplasticsurgery.com/wp-content/uploads/gallery-uploads/brachioplasty-21-300x225.jpeg)
Description:
- Patient is shown before and after brachioplasty technique first described by Dr. Aly over 20 years ago.
- The markings for the surgery are shown in the preoperative photographs
- In this case the arm reduction was combined with an upper body lift which eliminates the upper back rolls