Belt Lipectomy Patient 02
Back To Body Lift / Belt Lipectomy Gallery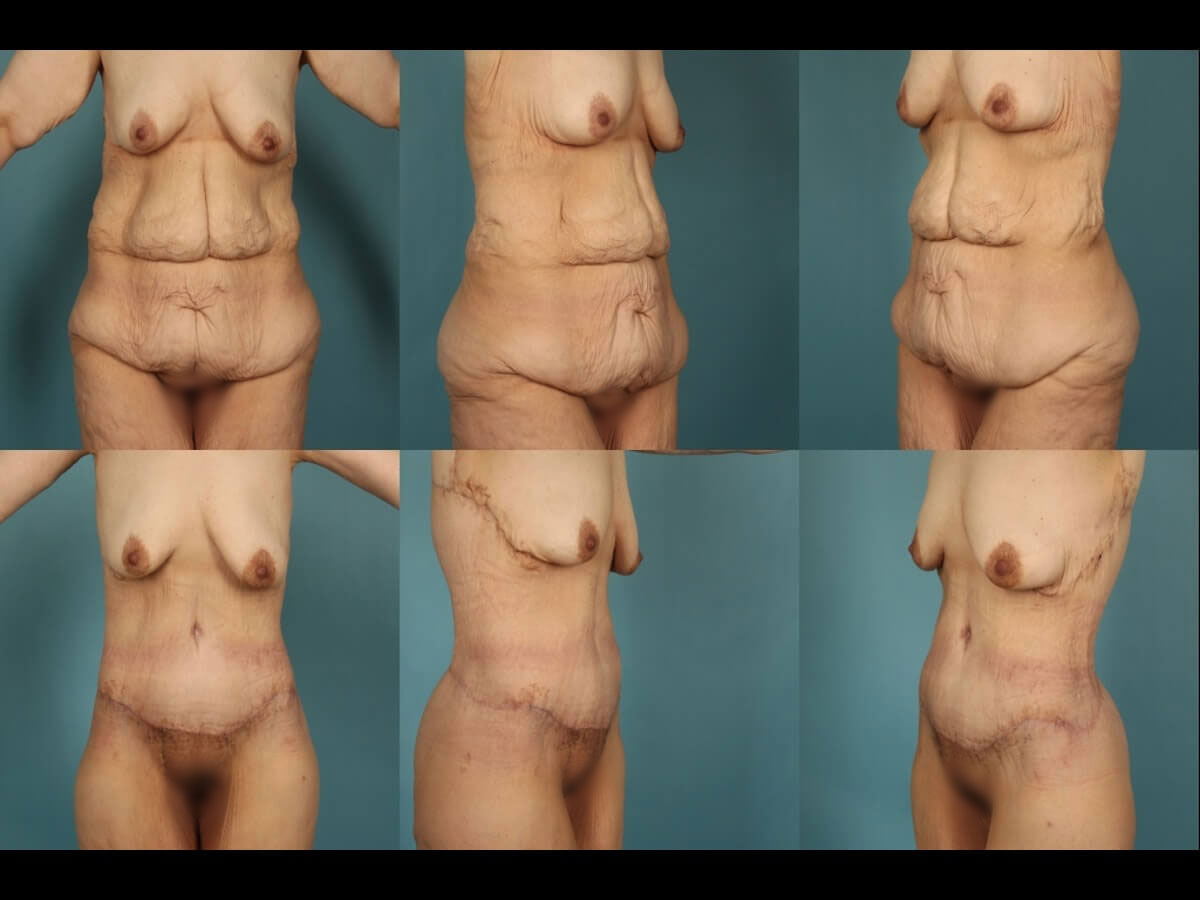

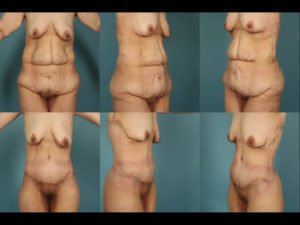
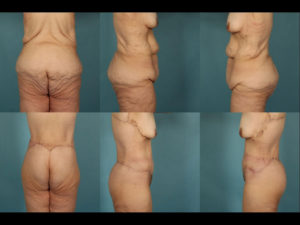
Description:
- This patient had more than the usual amount of weight loss and many surgeons would have considered doing a T type tummy tuck, which would have left her with a vertical scar from chest to pubic area.
- Her contour is much improved without a T vertical scar.