Skip to main content
Facebook
Instagram
Youtube
Get in Touch -
214-645-3565
Close Menu
Home
About Dr. Al Aly
Non-Opioid Pain Management After Surgery Approach
Enhancing Patient Comfort and Safety: Drainless Surgical Techniques
International Teaching
Procedures
Face
Facial Plastic Surgeries
Rhinoplasty
Ethnic Rhinoplasty
Revision Rhinoplasty
Brow Lift
Eyelid Surgery
Facelift
Ear Surgery (Otoplasty)
Body
Body Contouring Procedures
Body Lift
Upper Body Lift
Thigh Lift
Arm Lift
Liposuction
Drainless Tummy Tuck
Mommy Makeover
Breast
Breast Surgeries
Breast Augmentation
Breast Augmentation with Lift
Breast Implant Removal
Breast Lift
Breast Reduction
Breast Revision
Non-Surgical
Injectables and Fillers
Photo Gallery
Video Gallery
Reviews
Financing
Blog
Contact
Get in Touch -
214-645-3565
Schedule Your Consultation
Facebook
Instagram
Youtube
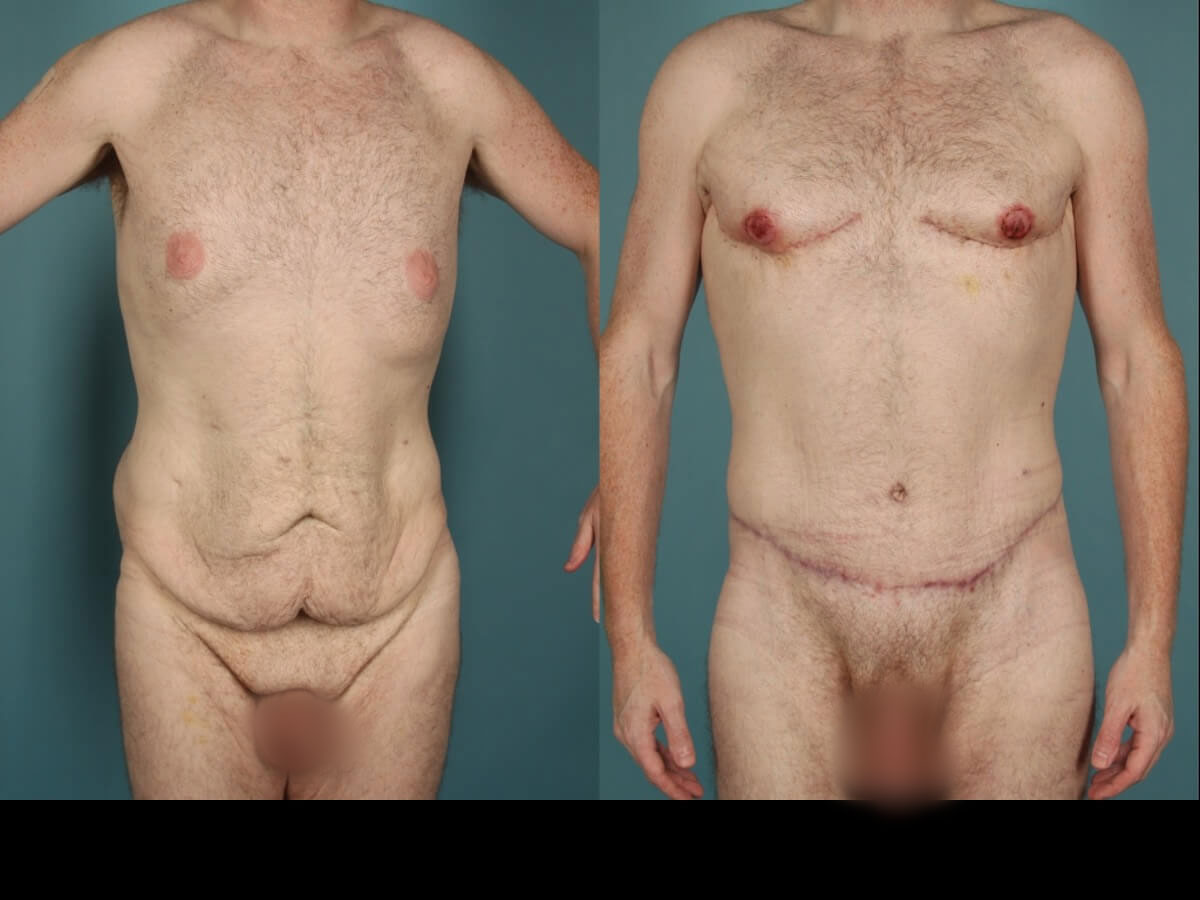
Belt Lipectomy Patient 03
Back To Body Lift / Belt Lipectomy Gallery
Description:
This patient underwent two separate procedures
Belt lipectomy first
Reconstruction of chest second
Previous Patient
Next Patient